
過去一年,多模態與長上下文能力已經由概念走向日常開發實務。以下內容由零開始帶你完成一次完整體驗:如何在 Cursor 建立高效率工作流、如何善用長上下文與視覺理解輔助除錯,以及如何用一個可落地的全端任務管理示例,示範端到端的設計與實作。文末附上可直接執行的後端程式碼骨架與前端實用提示策略。
一、為何值得一試:多模態 + 長上下文在開發中的價值
- 面向大型代碼庫的連貫理解:在一次對話中維持跨檔案的型別與接口一致性,重構速度明顯提升。
- 截圖/圖表理解輔助除錯:針對 UI 排版、ARIA、層疊次序等問題,透過圖像輸入快速定位成因與修正方向。
- 清晰的推理過程輸出:從錯誤訊息到修補方案,能同時附帶風險與替代路徑,縮短實驗迭代。
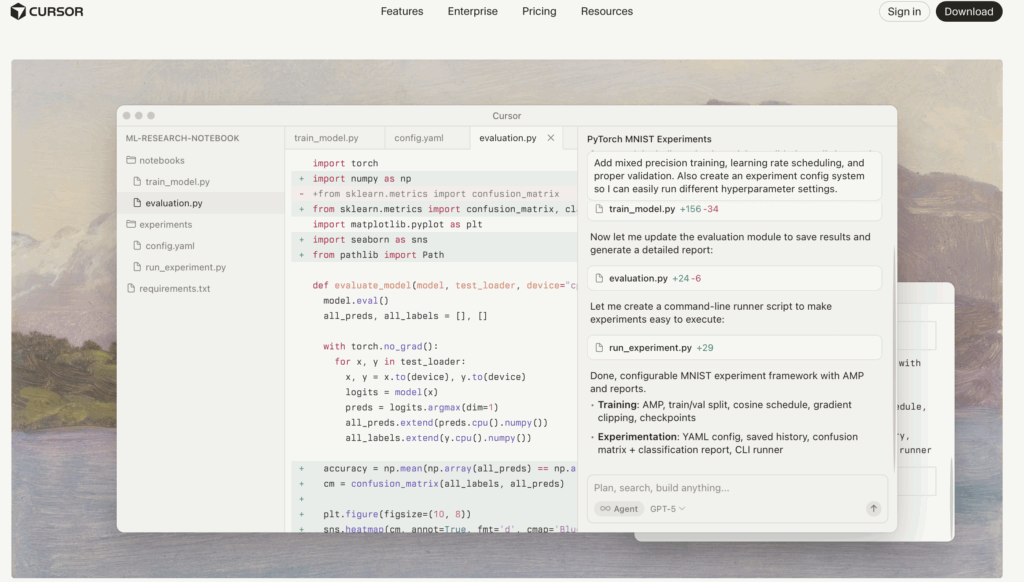
二、在 Cursor 上開展工作流
- 安裝與登入
- 下載 Cursor 安裝後登入帳戶,打開 Command Palette(Ctrl/Cmd + Shift + P)確認登入狀態。
- 設定 AI 模型
- 前往 Settings > AI Models,於列表中選擇可用的高階模型,留意速率限制與使用額度。
- 專案初始化與上下文策略
- 建立專案資料夾(例如 gpt5-task-manager)。
- 先提供資料夾樹與核心檔案,逐步補充需求與約束;要求回應只輸出「變更檔案完整內容 + 變更摘要」,保持迭代乾淨可控。
三、端到端實作:AI 輔助的智慧工作管理員
目標
- 前端:React + TypeScript + Tailwind,包含任務列表、篩選、編輯、狀態切換與 Loading。
- 後端:Express,提供任務 CRUD、任務分類、優先級計算。
- 多模態:支援拖放上傳截圖,從圖像抽取與任務相關的建議與待辦。
前端關鍵點
- 型別優先:Task、TaskPriority、TaskStatus、Filter 等核心型別先行,避免接口漂移。
- 可訪問性:為互動元件加入 ARIA 屬性與鍵盤操作、焦點管理。
- 輸出約束:要求 AI 嚴格 TypeScript、只回傳變更檔案完整內容與簡短原因。
四、後端 API 範例(可直接執行的骨架)
說明
- 先以可測試的 Mock/規則法啟動流程,確立端到端交互與資料結構;之後再替換為實際推理服務,並加入重試、超時與日誌。
程式碼
// server/index.js
const express = require(‘express’);
const cors = require(‘cors’);
const app = express();
app.use(cors());
app.use(express.json());
/**
- 模擬資料層(真實環境請替換為資料庫)
*/
const tasks = [];
/**
- 任務分類(Mock 規則 + 回退)
*/
app.post(‘/api/categorize’, async (req, res) => {
const { description = ” } = req.body || {};
const rules = [
{ kw: [‘urgent’, ‘asap’, ‘critical’], cat: ‘Work’ },
{ kw: [‘buy’, ‘purchase’], cat: ‘Shopping’ },
{ kw: [‘exercise’, ‘health’, ‘sleep’], cat: ‘Health’ },
{ kw: [‘learn’, ‘study’, ‘course’], cat: ‘Learning’ },
];
const lower = description.toLowerCase();
const hit = rules.find(r => r.kw.some(k => lower.includes(k)));
const fallback = [‘Work’, ‘Personal’, ‘Shopping’, ‘Health’, ‘Learning’, ‘Entertainment’];
const category = hit?.cat || fallback[Math.floor(Math.random() * fallback.length)];
res.json({ category });
});
/**
- 優先級計算(規則 + 到期日)
*/
app.post(‘/api/calculate-priority’, (req, res) => {
const { description = ”, dueDate } = req.body || {};
let priority = ‘medium’;
const urgent = /urgent|asap|critical|emergency|today/i.test(description);
const low = /maybe|someday|eventually|optional/i.test(description);
if (urgent) priority = ‘high’;
else if (low) priority = ‘low’; if (dueDate) {
const days = (new Date(dueDate) – new Date()) / 864e5;
if (Number.isFinite(days)) {
if (days <= 1) priority = ‘high’;
else if (days <= 3 && priority !== ‘high’) priority = ‘medium’;
}
}
res.json({ priority });
});
/**
- 任務 CRUD(簡化版)
*/
app.get(‘/api/tasks’, (_req, res) => res.json(tasks));
app.post(‘/api/tasks’, (req, res) => {
const now = new Date();
const newTask = {
id: ${now.getTime()}-${Math.random().toString(36).slice(2, 8)},
title: req.body.title || ‘Untitled’,
description: req.body.description || ”,
status: ‘pending’,
createdAt: now.toISOString(),
dueDate: req.body.dueDate || null,
category: req.body.category || ‘Personal’,
priority: req.body.priority || ‘medium’,
};
tasks.push(newTask);
res.status(201).json(newTask);
});
app.patch(‘/api/tasks/:id’, (req, res) => {
const idx = tasks.findIndex(t => t.id === req.params.id);
if (idx === -1) return res.status(404).json({ error: ‘Not found’ });
tasks[idx] = { …tasks[idx], …req.body };
res.json(tasks[idx]);
});
app.delete(‘/api/tasks/:id’, (req, res) => {
const idx = tasks.findIndex(t => t.id === req.params.id);
if (idx === -1) return res.status(404).json({ error: ‘Not found’ });
const deleted = tasks.splice(idx, 1)[0];
res.json(deleted);
});
const PORT = process.env.PORT || 3001;
app.listen(PORT, () => console.log(API ready on http://localhost:${PORT}));
啟動
- 安裝依賴:npm init -y && npm i express cors
- 啟動伺服器:node server/index.js
五、圖像任務創建:多模態互動的簡潔示例
用途
- 拖放一張圖片(例如白板、手寫待辦、凌亂桌面),解析出建議任務或整理行動,提升輸入效率。
React 元件概念(重點邏輯)
- 以 FileReader 轉 base64,上傳至後端自訂端點或直接在前端模擬解析。
- 請求返回一段人類可讀建議,再提供「一鍵建立建議任務」的流程。
六、實戰小技巧:讓輸出更可靠
- 先定義資料契約再叫模型寫 UI:Task、Category、Priority、Status 的型別與合法值要先鎖定。
- 控制輸出風格:要求「只輸出改動檔案完整內容 + 變更摘要」,避免冗長說教。
- 善用測試:當模型改動邏輯時,要求同時輸出單元測試,避免回歸。
- 視覺任務要寫清意圖:提供截圖時,同時描述目標(例如欄寬、斷點、對齊與等高需求)。
七、常見問題與排解
- 模型列表見不到期望選項:更新 Cursor、重啟應用、稍後再試或檢查地區限制。
- 長上下文仍出現答非所問:拆分步驟、逐段注入上下文、縮小單輪指令的目標。
- 代碼不一致:集中管理公共型別與接口、開啟 TypeScript 嚴格模式、加 ESLint。
- 多模態建議偏差:提供更清晰的圖片與具體的設計/語義要求。
八、擴展與投產建議
- 把 Mock 換成實際推理 API 前,先加入重試、超時、降級與可觀測(請求/回應日誌)。
- 使用環境變數存放密鑰,避免提交版本庫;敏感資料先做脫敏。
- 為 AI 輸出建立校驗與回退路徑:例如分類或優先級結果需二次確認或允許人工覆寫。
結語
多模態與長上下文能力,配合 Cursor 的互動式工作流,已足以支撐從骨架生成到迭代除錯的日常開發。以清晰的資料契約、逐步注入上下文與約束輸出格式為核心原則,可以把模型穩定地融入你的工程節奏。從小型任務板開始練習,再把相同方法推廣到更大的代碼庫與團隊流程,你會感覺到實打實的生產力提升。
附錄:前端提示工程模板(可直接放入指令區)
- 角色:資深全端工程師
- 輸出要求:
- 只輸出「變更檔案列表 + 每個變更檔案的完整內容」
- 每個檔案附三行內變更原因
- TypeScript 嚴格模式、可訪問性優先、保留現有代碼風格
- 流程:先提案資料模型與檔案結構;經確認後再生成代碼;生成後附單元測試與基本用法說明
附錄:任務資料型別參考(可在前端共用)
ts
export type TaskPriority = 'low' | 'medium' | 'high';
export type TaskStatus = 'pending' | 'in_progress' | 'completed';

export interface Task {
  id: string;
  title: string;
  description: string;
  category: 'Work' | 'Personal' | 'Shopping' | 'Health' | 'Learning' | 'Entertainment';
  priority: TaskPriority;
  status: TaskStatus;
  createdAt: string; // ISO
  dueDate?: string | null; // ISO
}

![[實用AI 資訊]深入理解 Token:大型語言模型(LLM)的基石](https://huisi.com.hk/wp-content/uploads/2025/08/下載.jpeg)